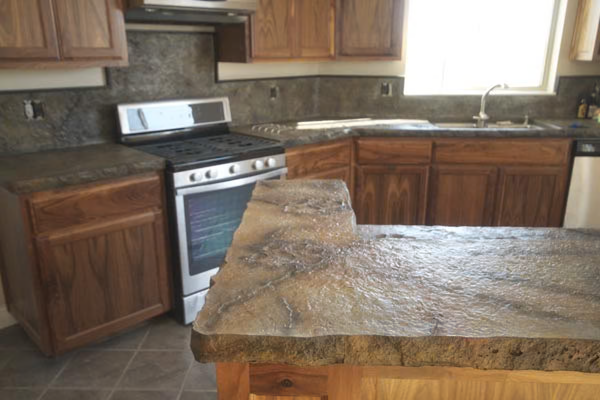
Guide to Stamping A Concrete Countertop
In order to stamp your concrete countertop you will need a few things.
Spray Bottle for Release
A tool to apply pressure to the texture mats. A steel trowel or a magnesium float works well for this.
Once you’ve acquired all these items you are ready to pour and stamp. Start by forming the countertop. You will pour the concrete and finish it with a magnesium float and steel trowel just as you normally would. There is no altered setup or pouring processes. For proper finishing technique, checkout this video.
Once you get to this point, you will want to make sure that your concrete is ready for stamping. Check to see that the concrete has reached the right stage of “plasticity”. If you begin stamping too soon, the concrete won't be firm enough to hold a well-defined imprint. If you start stamping too late, not only will stamping require more effort, but you’ll also produce little or no texture with the stamps. The concrete should have a dull look (all moisture is evaporated from surface) and be firm to the touch. With moderate pressure, press your fingers into the concrete surface at several locations on the countertop. If you leave a clean imprint (no wet concrete stuck to your finger) that is about 3/16" to 1/4” deep, you can generally begin stamping.
Slate texture mats for stamping concrete countertops.
When your concrete is ready you will first apply a layer of our “Z Realease” product evenly across the surface of your concrete stamps. You can also lightly mist the surface of the concrete. Now you are ready to stamp. Start at one end of the countertop and work your way towards the other end making sure you overhang the mat slightly over the edge areas and overlapping each mat as you move forward. Place the mat on the concrete surface and with firm pressure, tamp it down with your magnesium float by striking the top side. Leave this mat down and place your next mat so it slightly overlaps the first and tamp it down. Be careful not to tamp too close to the edges of the mats or you may leave a line in the concrete. Pick up the first mat by grabbing opposite sides of the stamp and pulling them up away from the concrete forming a “U” shape with the mat until the full mat is lifted from the surface of the concrete. It is important you do not drag or slide the mat while lifting it or you will leave lines in the pattern. If this happens, simply place your mat back down and stamp it over. Pick up the first mat and move to the adjacent unstamped area remembering to slightly overlap what you have already stamped. It’s also critical to rotate the stamp as you move along so you create a more random pattern with your impression.

