How to Pour a Waterfall Edge Countertop
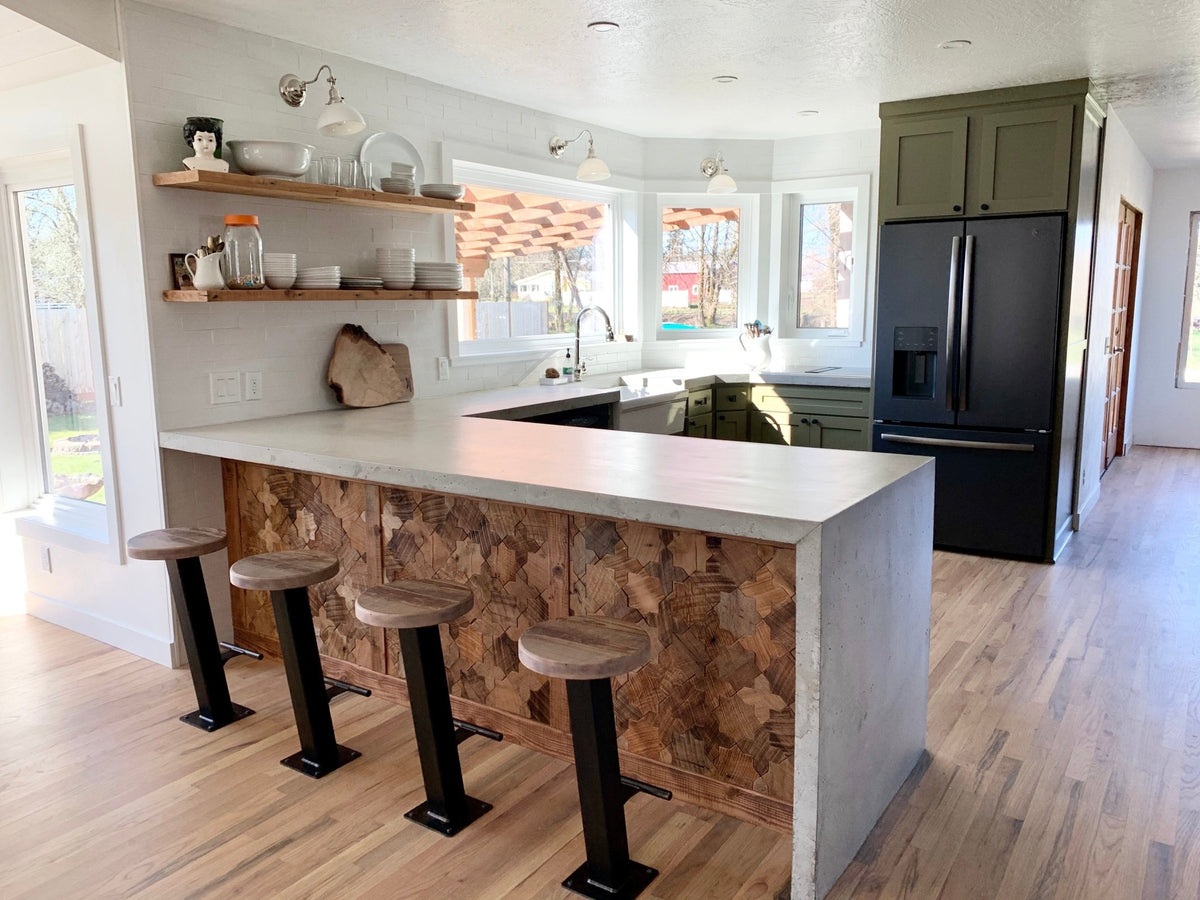
A Waterfall Edge can be trendy, elegant and practical. It adds pizazz and can transform a basic kitchen into something chic and stylish. It can also be used to hide plumbing/electrical wires, give support to an overhang or cover an unsightly cabinet or undercounter appliance. The downside? It’s not the easiest to accomplish for a DIY’er.
There are two ways to pour a waterfall edge with a concrete countertop: pre-casting or pouring in place. The instructions below are more suggestions/ideas on how a waterfall edge could be achieved. Although we don’t have a one size fits all “kit” for waterfall edges, many of our customers have had success forming and casting waterfall edges. Let’s start with the easiest option, pre-casting.
Pre-casting a waterfall edge for concrete countertops:
This is done just like any other pre-casted slab. You will build a form, usually out of melamine, to the correct dimensions, apply a release agent and pour. The width of your form should match the depth of the countertop it will sit under, the length of the form should match the height from the floor to the underside of your finished countertop and the depth will typically be between 1-1/2” to 2-1/4”. For the depth, there are a few things to consider. Our standard Square Edge form will give you a 1-1/2” overhang so you can build the thickness of your waterfall panel to match this. However, if you want the waterfall edge to be the same thickness as the rest of the countertop, you will need to build in a bit of extra overhang so that you can pour your waterfall panel at 2-1/4” thick to match the edge height of the standard Square Edge form. To do this, let your cement board overhang your cabinet on the side where the waterfall edge will go.
When pouring, you will want to add in some kind of reinforcement such as our FG50 mesh or welded wire mesh. Most pre-casted concrete countertops will have air bubbles and voids when the concrete is flipped over so they are typically slurried and polished before installation. A slurry is a special mix such as our Counter-Patch which is used as a grout to fill in any pin holes or voids in the edge or surface of the countertop. When pre-casting, it is highly recommended to wet cure or to keep covered with plastic for 48-72 hours in order to reduce the chance of curling. This happens when the top surface that is open to air cures at a faster rate than the concrete inside the mold. You will need to sand and seal this the same as you did to the surface. Once cured, set the slab in place and use a patch material to camouflage the seam between the countertop and the waterfall edge.
Cast in place waterfall edge for concrete countertops:
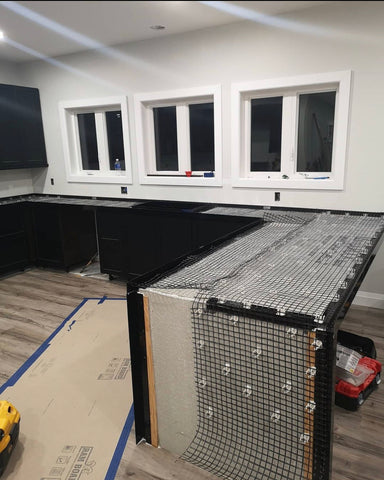
Pouring a waterfall edge in place is much more difficult than pre-casting and not recommended for beginners. The benefit is there is no seam between the countertop and the waterfall. The downside is if your form leaks or does not hold the weight of the concrete while casting, you will have some serious issues. If you think you are ready to tackle this project, the best way to start is to prep your cement board just as you did for the rest of the countertop. You will need to miter the forms to run down the side of the cabinet. Cut the cement board to the correct size and install the forms, clips and mesh. Once everything is in place, install the cement board on the side of the cabinet. Pre-cut a piece of melamine to size and place it over the side forms. You will need to secure the melamine and seal the seams. You could try securing it with woodworking clamps or build a custom brace. Temporary bracing should be attached to the floor to keep the melamine from bowing as it must hold the weight of all the concrete in the waterfall edge. It’s very important that the melamine is adequately braced. You can’t over-brace it. If the melamine bows and concrete starts to leak out, you will have a big mess on your hands. Make sure to slowly fill the waterfall mold so that the concrete settles into place. Do your best to vibrate the melamine form as you pour so the air can work its way out. After the concrete has cured and you removed the melamine, you will also need to patch to fill in any voids or air pockets and apply a concrete sealer.
Image showing how to miter the forms to run them down the vertical side.
Whichever method you choose, we recommend using a flowable concrete mix such as our White Countertop Mix or our LiquiCrete additive. If you aren’t sure on which products or how much material to order, please send us an email or fill out this form and we can help make sure you receive everything you will need for your project.


